
Tracks Department
Environmentals
In this series we will explore the practical applications of
"Environmental" FX in scale.
"Environmentals" are simply nature's sounds. When we build model scenery we are literally modeling a habitat. So why wouldn't we model the inhabitants?
OK, building a Z scale bird, frog, or cricket is most likely not worth the effort, but we don't need to build models of the critters themselves. We can easily create the illusion that these critters are living there in our scenery by modeling the sounds of those critters in scale. It is often the case in the prototype scene that we hear these critters without actually seeing them. Remember, when it comes to sound, you don't have to see it to believe it!
It is always easier to build a scale aural image than it is to build the counterpart scale visual image. This technique is so simple that you will wonder why you hadn't done it sooner. Of course, when you don't have to create the soundtracks in the first place, it is MUCH easier.
That's why we've gone into the recording studio for you!
The TRACKS are "ready to run", and free for the downloading. We built the SAME speaker system you will learn how to build here. We "tweaked" the soundtracks in the studio until they sounded good on THAT system, and then transcribed them into sound files for you. We'll show you step by step how to download these tracks and create cassette "loops" that will sound absolutely real through your new "reference monitors"! Even if you need to buy all of the parts, the whole system will cost less than twenty-five dollars!
The series is in four parts:
- Part One: The Soundtracks
- Part Two: The Audio System
- Part Three: The "Reference Monitors"
- Part Four: The Installation
- Designer's Notes
- Enginear's Notes
In this part you will learn how to create cassette loops that will serve as the program material in your environmentals system...
What you will need:
- A computer and software capable of playing a 16 bit stereo sound file (QuickTime 3 "soundtrack")
- On a PC, you'll need a sound card with stereo line level outputs
- A cassette recorder with line level inputs and a "pause" button
- A stereo patch cord
- A standard 30 - 60 minute cassette tape (or answering machine loop cassette tape)
What you'll do:
Downloading the files...
Downloading is easy. Go to The Magic Forest Symphony, find the movement(s) that have the 'character' that you want for your particular model scene.
Set-up for transcription...
Once you have collected all of the files onto your computer (loaded the pages and have the sounds in the disc cache) you are ready to set-up for transcription to cassette. The set-up is straightforward. You will need to make the audio connection between your computer and your cassette recorder by connecting the left and right audio line level outputs of your computer or sound card to the left and right audio line level (or "record in") inputs of your cassette recorder with a standard component stereo patch cable (most likely a male RCA to male RCA pair). You may wish to use a MD or CD recorder to make master tracks for later transcription to cassette. Matching left and right channels between the machines is not important at this point, as long as both channels are connected. Open the first movement (page) in any browser that will play it. Listen through the soundtrack in its entirety. Become familiar with the complete performance, and learn how to 'conduct the orchestra' (interact with rollovers). Repeat this process with each of the pages you want as this will help you to make some of the editing decisions in the next few steps.
At some point you must decide what type of cassette tape format you will mix down into; either an answering machine continuous loop, or conventional two sided cassette (my favorite). Each type has positive and negative aspects associated with it.
The phone answer machine loop tape is easier and faster to create, which is a positive in that you can get to playing it sooner. It is much shorter in length so it takes less time and fewer passes to fill it with sound. Another plus with the loop cassette is that once you start it playing you can forget about it until you are ready to stop it (it will just keep going continuously, no rewinding or flipping it over). On the negative side, the continuous loop cassette will likely be loaded with lower quality tape. This is not too critical sonically since environmental sounds are played back at such extremely low volume levels that things like tape hiss (tape noise) or minor distortion will be effectively inaudible. Still, lower quality tape will wear out sooner resulting in poorer reproduction, potential dropouts and potential tape failure (a tape being "eaten" by your player). It will also wear out sooner because it plays the same piece of tape more times in any given time period (putting you right back here, REtranscribing sooner). Perhaps the biggest drawback to the loop cassette is that there is not much room for quiet moments or variations (more later). Shorter loops can get monotonous and predictable much sooner. The longest loop cassette I have ever seen is four minutes, which is not really long enough (the biggest drawback!). If you decide to go with this format and can find a longer loop tape, buy it!
The standard 30, 45 or 60 minute cassette is probably the best way to go if you have some patience during the recording process, and if you don't mind flipping (or rewinding) the tape once in a while*. You can buy longer running 90 minute cassettes, but this is a thinner tape and more susceptible to becoming your player's lunch! In general, standard cassettes are loaded with higher quality tape which will sound better and likely make a better recording (quieter, less likely to go into distortion, etc.). Additionally, you can create a more pleasing composition within the longer format, with more quiet moments and variation which will appear completely unpredictable and more true to real life. Finally, this format will last longer than loops in that it will only be "handled" by your player once or twice in an hour.
*If you choose to use an auto-reverse deck, this would not be a problem.
In either event, you should consider making a master cassette from which you can make copies for use on your railroad. This eliminates the need to go back through the recording process described here when, not if, your tape wears out. It is easy to make duplicate tapes on any dubbing deck. A dubbing deck is the kind with two cassette machines in one unit, many ghetto blasters have this capability and will usually do a suitable job for our purposes.
Transcription to cassette...
Ok, you have chosen a cassette type, you've familiarized yourself with your new audio files and you are plugged in and just about ready to start recording... but hang on! Before you load that cassette into the recorder, read through this check list first!
- You should already be familiar with the various sound file segments you have downloaded. You probably already have some idea of the way you want to combine them onto the tape. If you do, go for it! There are really no wrong ways to do this, other than doing something that doesn't sound natural. Try to vary the the sequence, separate tracks with several cricket tracks, and leave quiet spaces (record nothing for a few seconds). Another trick to vary the effects is to reverse the left and right channels at one end of the patch cord when recording the same track several times! Remember, nature rarely does the same thing twice, and you are building a scale model of nature. And, as always... have fun!
- It is always a good idea to clean the heads and tape path of the tape machine before you do any recording. If you do not know how to do this, you should learn right now... keep reading. You are simply swabbing the deck! Get some Q-tip type cotton swabs (the wooden stick kind are available from your pharmacist and are easier to use), and a bottle of isopropyl alcohol and keep them around. This will cost about $2.00 and is a worthwhile investment. You will want to clean your playback deck(s) every ten hours of actual playing time as a matter of routine maintenance. This can literally make a world of difference. Dip the end of a Q-tip into the alcohol and wipe and rub the head(s) and anything along the tape path (capstan and pinch rollers), then repeat the process with several dry Q-tips. Let it dry completely for a few minutes before inserting a tape.
- If you have or can borrow a tape head demagnetizer, you should use that too. If you cannot find one, any magnet that will fit into the tape path area will do the job. Again this is simple. First, turn the tape deck off. Just move the demagnetizer or magnet around in a random way near the tape path. You must be careful not to actually touch anything, especially the head(s), with the demagnetizer or magnet! But you should move the demagnetizer tip or magnet as close as you can to the heads without actually coming into contact with them. Keep the demagnetizer or magnet moving at all times and make two or three passes in random directions. One final word of caution, if you are using the kind of demagnetizer that plugs into the wall, turn it on AND off at arms length away from the deck. You want it on as you move it in toward and out away from the deck. Keep the magnet or demagnetizer away from your computer, monitor and any storage discs. Commercial cassette cleaner/demagnetizer "tapes" notoriously DON'T do a very good job, but they are still better than doing nothing.
- If you have the software and hardware, and if you feel confident enough, you might want to do some or all of the editing in your computer. Digital editing is outside the scope of this article, but if you are already familiar with it, it is an excellent way to break up and reassemble the existing files. You can copy and paste away. You can fade in, fade out, cross fade between tracks, combine tracks... go crazy and have fun!
- If you are using a continuous loop cassette, look into the open edge at the exposed tape. If you see the splice where the two ends of the tape come together, go ahead and insert the cassette into the recorder. If you do not see the splice, put the tape into the recorder and advance the tape a few seconds. Now check for the splice again. Keep repeating this until you find the splice point. You will want to start your recording immediately after the splice, and end the recording sometime before the return to the splice. There is most likely going to be a momentary dropout at the splice point, and the object is to insure that any dropout appears during a period of silence.
- With a tape in the recorder and the recorder in PAUSE, drop the recorder into the record mode (usually by pushing the record and play buttons at the same time). Now play the entire soundtrack from your computer and watch the levels on the recorder closely. The levels should NEVER go into the red, not even for an instant. Like other recordings you may have made, environmentals depend on dynamic range and no distortion on peaks for their natural sound. But unlike other recordings, environmentals are effectively impervious to tape or recording noise. They are played back on miniature speakers, and at such low volume levels that the tape noise cannot be heard at the relatively distant listening positions involved. When the loudest voices push the meters up to or near '0 vu', you have the levels set right. You should be able to leave the levels in the same place for the rest of the recording process since the individual sound files were all level matched in the studio.
- NEVER use noise reduction such as Dolby B or C! It is not necessary and the cheap player will not be able to decode it. Even if the player you intend to use has noise reduction, it is better to refrain from using it. Again, it is simply unnecessary, and unless everything is working perfectly, it can cause some less-than-natural results.
- You should have your reference system "breadboarded". That is, you should have it operational with the speakers you will actually be using laying around and separated. Keep it handy, so you can test your finished cassette.
- DON'T WORRY! Environmentals are incredibly forgiving. Even when you screw them up they usually still sound great. All the warnings above are there because we want you to have the best sounding environmentals possible. When we were experimenting for this article we tried everything we could think of, and it all sounded fine. Of course some things sounded better or different, but literally everything sounded nifty. Have fun, you'll know if you actually want to record something over again... and that's easy too!
OK, you are about to make your first mix-down pass. If you have the first sound file cued up (ready to play) in your computer and a cassette loaded in your recorder, and if You can hit the pause button on the recorder when ever you wish. Pick the next file you want to put on your tape and load it into the computer (cue it up). Hit pause on the deck, 'play' on the computer, and repeat the process above. You will keep repeating this sequence until you have filled up your cassette tape. It is just that simple... that boring, that tedious, but that simple!
Here are a couple of tips to help make your mastering go faster. If you have taken the advise above and are making a master tape for duplication to working copies for use on your railroad, you can fill only side A of your master tape. Then when you are duplicating you can just flip the copy over, rewind the master, and fill the B side of your copy with the same program. This will not only save time in the mastering process, but also saves time when playing the copy on your railroad system. When the cassette finishes playing through your environmentals system, you simply flip it over and begin playing again immediately, rather than waiting while a single sided cassette rewinds in order to replay it. This also cuts down on the amount of tape handling (wear and tear) to your cassette copy.
If you are planning to insert a quiet space just let the recorder continue to record for a few seconds while you are cueing up the next file (keep your ears pealed for computer clicks or pops while files are loading). A period of silence is easy to do and really adds character to the final performance. A cricket chirp, for instance, becomes monotonous to the listener. After a while the listener "tunes out" the sound. When the same cricket stops for awhile (as crickets do), and then appears out of nowhere, it has a startling effect with much more impact than if it had been chirping all along. And, it is an easy way to fill up a tape!
In this part you will learn how buy your playback system and modify it for scale sound in a few minutes...
What you will need:
- About fifteen bucks
- Enough time to run to Walmart, or K-Mart, or...
- A transformer to go between the wall and your cassette player (or, yuk... batteries)
- A few feet of 24 ga. two conductor wire (depending on the scale and size of you layout)
What you'll do:
Go to Walmart or K-mart or any mart that sells ridiculously cheap cassette player/headphone bubble packs, and purchase one (or more)! You should not need to spend more than $14.95 plus tax, or you should probably try another mart. I literally did this. I went to Walmart and asked a clerk for "the ridiculously cheap cassette player/headphone bubble packs", and he pointed me to the end of isle 14... during that sale, they were $5.00 plus tax! While you are there, if your cassette player doesn't come with one, look for a "wall wart" (a transformer that plugs into the wall and your deck). If you buy them separately, make sure that the transformer delivers the correct voltage for your particular cassette player.
By the way, you should be able to use almost ANY cassette player for environmentals. If you have an old home stereo deck or car stereo deck you can allocate to the task, you can use it. Always clean and demagnetize the heads and tape path of any machine (see above). If you choose to use a home stereo tape deck, it will likely have a headphone output for which you may need a stereo 1/4" phone to 1/8" mini phone jack adapter (available at Radio Shack, number 274-367). If you choose to use a car stereo unit, you will need a 12 vdc, 3 (or more) amp power supply (Radio Shack, number 22-504), or old train power pack to power your system. You should use the car unit's amplifier outputs to drive your system, just keep the volume way down! The little disposable decks mentioned above are probably a better choice even if you have a spare car stereo deck. With their larger built-in amplifiers, car decks are better suited to the tasks of Electric Fire or point source FX described elsewhere in the site. If your particular deck has auto-reverse, all the better, you'll never have to flip a tape over.
If you do not already have some suitable wire laying around, you will have to go to the local hardware or electronics store to find it. If your layout is small, or if you only intend to use environmentals in one place on your layout, you may not need additional wire. The headphone plug and wires that come with the cassette player may be enough for your installation. Any small gauge two conductor wire (20 ga to 26 ga) will work for the short lengths and low voltages involved in these installations. If you will use a distributed system with several speakers tapped along a buss over 15 feet in length, you can buy 16 - 18 ga zip cord for the busses. If you only plan to use one set of headphone speakers, you could buy a headphone extension cable (Radio Shack number 42-2462).
Take a look at the headphones that came with your player. Pull back one of the foam earpieces if you need to, and examine the actual speaker element inside. If it is one inch in diameter (or close to 1 inch), you might be able to use these elements. If you have already downloaded the tracks and your computer has the right headphone jack, plug these headphones in, lay them on the table in front of you, and play a soundtrack through them. If the environmentals sound realistic at quiet (very low) levels, you're in! Keep in mind that environmentals should NEVER be loud. The most common mistake made in applying environmentals is trying to play them too loud. The reference speakers described in the next part of this article are capable of reproducing sound somewhat louder than is necessary, but they should not be pushed too hard. You can fry the speakers, and your frogs and crickets will sound fried too! Remember: a prototype cricket is small, and these are SCALE crickets!
If the speaker elements in your new headphones are suitable for your environmentals system purposes, dismantle them! This is usually easy to do. Basically you just want to remove the head piece and foam earpieces. You can wait until later to remove the foam if you want to leave it on for protection. If the foam is black or gray, you may not want to remove it at all, it may be easier to conceal them if they are a neutral color. Usually this does not require any tools. Often, the speaker element is mounted in a plastic basket, sometimes these have perforations or slot openings. If you choose not to use the PVC horns described below, you can leave these baskets on as they will protect the elements and do not adversely affect the sound (in some instances they actually improve the sound). The main object here is to separate the two elements. Many headphone cables have a small square nut that is there to keep the two wires from separating. Since you want to separate these wires, slide this nut down toward the mini-phone jack in order to achieve the maximum separation. You should be able to just peel the two wires apart all the way down to the plug.
If your layout is small, or in a small scale, you may not have to do anything else to prepare your system for installation!
Part Three: The "Reference Monitors"
In this part you will learn just how simple and inexpensive it is to build an...
What you will need:
- (2 or more) Circuitron #800 - 9151, 7/8" speakers (optional)
- (2) PVC 1/2" couplings (optional)
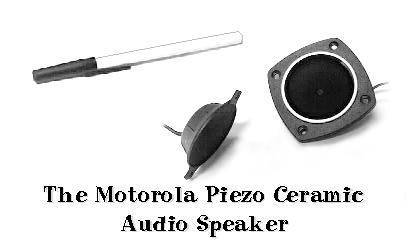
- (2) Motorola KSN 1020A Piezo Ceramic speakers (optional)
- five minute epoxy
- soldering iron & electrical solder
- mini phone plug & 24 ga wire (or headphone jack & wire from cassette player headphones)
What you'll do:
If your cassette player came with headphones, and if the speaker elements in them are 7/8" in diameter, and if you are willing to allocate these headphones to environmentals duty, you may not need to spend any additional cash. The decisions you will make at this point will be based on several factors, all having to do with the nature of your specific railroad.You might consider the following:
- What is the physical size and shape of your pike?
- Will you apply a single stereo system (or several separate stereo systems)?
- Will you apply a distributed system?
- Which speakers will you use?
- How many environmentals systems will you want to use?
Pike size? If your layout is 4 'x8 ', or smaller, a single stereo system is likely all you will ever need. Larger layouts will generally be best served by a distributed approach, or multiple stereo system installation.
Single stereo system? This is the easiest and cheapest way to go, and therefore an excellent first project. If you are really pleased with the results, you can always install additional single stereo systems later (my favorite approach!).
Distributed system? Virtually identical to a single system, with two exceptions: 1)You will run a pair of busses (left and right channel) around your layout, "tapping" sound at various points by splicing into these busses. 2)You must use "matched" speakers for this. This approach can be better on larger layouts and club railroads. There IS a limit to how many speakers you can safely attach in parallel, and you may need an amp (or car stereo deck with amps) to drive more than two pair of speakers.
Which speakers? If you you build a single stereo system, you may be able to use the headphone drivers that came with your new cassette player, but this can be risky as these speakers are not always capable of creating enough sound pressure. Try them out before you make a decision. If a distributed approach is right for your railroad, you should buy two or more pair of speakers from Circuitron ($2.00 each in bulk). In either case, I suggest you go for the reference monitor systems for more predictable results.
How many systems? Don't laugh, two stereo systems can more than double the fun and interest of this effect! Once you have gone through the downloading and mastering processes, you are only about $14.95 away from your next system. When you hear the results, and observe others responding with smiles, multiple systems will start to sound like a pretty good idea. Also, unless they are started at exactly the same time, multiple systems never link up exactly, so that you have a constantly varying acoustic "mix" around your pike! Very nifty!
You should seriously consider attaching the "horns" (see: Figure 1). These 1/2" PVC pipe couplings (for coupling two 1/2" PVC pipes) couple the speaker to the air. They additionally work as a resonator (akin to a pipe organ pipe). The reason for the horns is to make the system more efficient on tiny headphone amplifiers, and they really work. You can find these couplings at any hardware store for about 19 cents each. Just glue, or better yet, epoxy a speaker to one end of each PVC coupling. The speaker can face into, or out of, the coupling, do whatever physically fits the best, it most likely does not matter sonically. Technically the coupling acts as a horn mounted onto the front of the speaker, not an enclosure mounted on the back of the speaker. Try holding the speaker onto the coupling both ways while it is playing if you want to double check first. That is really all there is to it!
Fig. 1
These are the "reference monitors" I used to mix down your Environmentals soundtracks! Notice the "strain relief" created by dragging the epoxy out onto the wire where it joins the speaker. I slid the nut down to the plug end of the cable in order to achieve maximum separation between the left and right speakers. I had to use a 1/8" mini phone to 1/4" phone adaptor to mate up with the headphone output on my amplifier.
In this part we will explore some ways to apply and conceal your environmentals audio system...
What you will need:
- Your layout
- All the pieces of your environmentals system
- Wire strippers, electrical tape, a soldering iron, wire cutters
- The usual assortment of modeling tools (drill, xacto knife, etc.)
- One or more functioning ears
What you'll do:
You can hardly go wrong installing environmentals... it is
literally almost impossible! These little speakers and voices
are very forgiving! Normal things like time-alignment, electrical
phase, and point source imaging are no longer involved with the
speaker elements scattered around you layout and facing different
directions. Speaker placement IS important to the extent that
you will most likely prefer one location over another one, but
even this is substantially subjective. If you can, twist some
extension wire onto your "reference monitors" and experiment
by just placing them around you pike in typical locations (see
below). Then listen! Try turning them to point in different directions...
then listen again! There is no rush to permanently install  your system (you are already playing
at this point). Indeed, you must live with and listen to it for
a while as part of the installation process! Does it sound good
to you from many places around the layout, around the room? Now
try running a train, or two, and listen again. Invite family
and friends in and watch them for their reactions (before you
tell them why). If they don't notice that the system is playing
at first, you likely HAVE set the volume at an appropriate level!
Then ask them what they think, and listen to them! Ultimately,
you will make the decisions as to where and how to permanently
install each speaker element by listening. The ONLY criteria
is what makes you happy! All you really need to know is WHEN
you like what you hear (you can do that). Listen... you'll know
when things are just right.
your system (you are already playing
at this point). Indeed, you must live with and listen to it for
a while as part of the installation process! Does it sound good
to you from many places around the layout, around the room? Now
try running a train, or two, and listen again. Invite family
and friends in and watch them for their reactions (before you
tell them why). If they don't notice that the system is playing
at first, you likely HAVE set the volume at an appropriate level!
Then ask them what they think, and listen to them! Ultimately,
you will make the decisions as to where and how to permanently
install each speaker element by listening. The ONLY criteria
is what makes you happy! All you really need to know is WHEN
you like what you hear (you can do that). Listen... you'll know
when things are just right.
Although there is really no wrong way to do it (IF it sounds good to you), I have included some art and a "check list" of suggestions for you to look through, to guide you in the right directions. Look through the following, it should help...

General Notes: The inductive speakers face down and back, the open end of the PVC is the business end and should face up and/or slightly forward.
The optional Motorola PZT's are mounted behind the scenery and face up and/or away from you.
Environmentals Installation Check List:
- "Pigtail" all the speakers with several feet of small gauge wire. To do this, solder wire to each speaker's positive and negative terminals, and then strip one half of an inch of insulation from both conductors at the other end.
- Set up your player and attach all of the speaker leads by twisting them to the pigtailed headphone cable outputs. You will want to temporarily electrical tape the bare wires to avoid shorting when you are handling or moving the speakers.
- Choose locations that are not easily seen, this simplifies or eliminates installation problems and camouflaging later.
- Explore the possibility of mounting the inductive devices "through the benchwork". In this application the speaker end actually points down at the floor, away from the listening position. The open end of the PVC coupling or pipe is inserted through a hole drilled in the table top (eventually being angled and epoxied or hot glued into place), see illustration above. If the PVC is fairly flush with the table top, it can be easily concealed with lichen, or a building, or almost anything for that matter. Try to keep the open end free from too much obstruction, to aid in coupling to the air above your scenery. The inside and any exposed parts of the PVC can be painted any color in order to help conceal it. Laticies and acrylics work well on PVC plastic.
- One pair of piezo ceramic speakers, or PZTs, is usually all you will ever need (see: Figure 2). The Motorola model number is either KSN1020A (no mounting tabs), or KSN 1021A (mounting tabs). You can order Motorola tweeters at many car stereo stores, but call ahead first. There are several styles available at the car stereo stores, but the ones you want are only available in a mounting grill, under the model number 1078. The price varies for store to store, and your store may have to order them for you. Radio Shack carries a "Realistic" version with the same mounting grill, number 40-1383 for $4.99 each. Piezo (pronounced: p - A - zo) ceramic speakers are not like conventional inductive speakers. They do not have a voice coil or magnet! They contain a thin wafer of ceramic crystal (P= lead, Z= zirconate, T= titanate, I think), which expands and contracts with the presence of a signal voltage. They are extremely efficient and do not require a crossover. They just "roll in" at the frequencies where they want to operate (in this case, 5khz), when connected in parallel. This makes them easy to hook in. Wired in parallel with a cheap inductive element they just naturally create a two-way speaker system. Some birds and cricket chirps literally leap out of PZTs,... most frogs and owls, for example, don't.
Fig. 2
That is a BIC pen for size comparison on the left,
a KSN 1021A is in the center, and the Radio Shack/car stereo version is on the right.
- If you wind up using either the Radio Shack or the car stereo version, the actual piezo transducer (seen in the center of Figure 2, above) can be easily removed from the mounting grill (seen on the right). You may wish to do this in order to aid in hiding/installing the piezo itself. Just drill out the plastic rivets holding the mounting tabs to the grill and frame with a 1/4" bit turning at a slow speed. Depending on where and how you intend to mount your piezo speakers, you may not need to do this step. Any version piezo can be painted to match surrounding scenery with a thin coat of acrylic, without audible degradation to the sound. Hint: most any piece of lichen will make an excellent grill cover!
- If you opt to use Motorola PZTs, always place them pointing away from any listening positions. If you can, aim them at the wall or backdrop, or at the ceiling. This will diffuse the extreme localization point sourcing that PZTs are famous for. They are so efficient that they will call attention to themselves if you are not careful about this. You may even have to muffle them with cloth or lichen, or even by laying them face down against the scenery. They really crank out the high end!
- When using PZTs, lower the the treble (or tone) control! You will be turning the tape and system noise down at the same time. This also helps to balance voices between the highly efficient PZTs and the less efficient inductive speakers.
- Place PZTs as far apart as possible! You can even try hiding them elsewhere in the room! Try it, it can be amazing!
- As various voices move up the frequency spectrum, they move from inductive device to the PZT, creating movement between the two devices on the same channel. Listen for this and you can use it to your advantage.
- Start by maintaining electrical phasing (see Enginear's Notes below) by connecting all positive leads together, and all negative leads together. This will help you keep track of what you are doing as you go along.
Designer's Notes:
A part of you will want to get started ASAP. I do not blame you! But IF you want to get creative with your new medium read on! The better it sounds, the more fun it is to hear it, and the more magical it appears! After all, that is why you came here. You are creating an illusion, the illusion that there are actually critters in the scene. The more you understand about how the trick works, the better you (and your layout) will perform it!
About the perception of loudness in scale sound...
- Scale sound is not rock and roll. Loud is not better in this instance. Try to resist the temptation to turn it up just because visitors to your pike appear not to notice your new sounds. It is disconcerting to go through the changes to create and install Environmentals FX, only to have many visitors seem to ignore or be largely unaware of them. Yet, when Environmentals are applied correctly, that is the way they are supposed to work. It is only natural for the listener to ignore that which sounds RIGHT. So, a job well done will often be acknowledged by neglect! Indeed, you can measure your success by this yardstick. Try to get used to it by remembering that this neglect is actually unsolicited praise! And when your new critters do call attention to themselves (and they will, see below), they will sound completely natural and real to the visitor who does lean over and get into them!
- There is always a counterpart in the aural image to everything that exists in the visual image ...ALWAYS! For instance, you are used to visitors looking at the overall scene. Some visitors will not go beyond the cursory glance, but if something catches their eye they will bend over, lean down, squint and strain to see the detail and become INVOLVED in interaction with the model! The same holds true for the aural image! If something catches your ear, or if you hear something out of the corner of your ear (yes, I said that), your attention is drawn to it. At that point, you will become involved, and drawn into interaction with it. We have tried to help in this endeavor by making sure that every once-in-a while, a bird, frog or other critter leaps out to capture your attention. Leave the volume down at the reference level and let the soundtrack do the work, automatically.
- Sometimes it may seem that there is no sound at all. This is not necessarily an indication that the volume is too low. Sometimes there ARE silent passages. Your soundtracks are designed to resist monotony. The listener tends to naturally tune out a constant repetitive sound such as a cricket chirp. We can (and do) take advantage of this effect in two ways. First, we try not to over-utilize the same voice for too long at a time, in order to avoid evoking sublimation (we don't want give the listener a chance to get bored with it). Secondly, we occasionally go to the opposite extreme by literally building a voice over time until we think the listener has had a chance to sublimate and become complacent with it. Then we stop it suddenly in the hope that it will be missed! Both of these techniques are applied in a subtle way, but are very effective. Watch you visitors, your new sound system should keep them on their toes.
- Sometimes the overall volume actually is too low, and you really will have to turn it up. But be patient and do not make hasty decisions. It is very easy to wind up chasing volume levels around in perfectly vicious little circles! If you are aware of the subtleties built into your soundtracks, they cannot fool you. The idea is to fool your audience (guests)!
About the placement of speaker devices...
- Before you settle on any mounting scheme, give your system a final check by paying particular attention to the stereo image! Focus your ears on the stereo delay and reverberation images. These components should occupy the entire sound field created ABOVE and between the speakers. With Environmentals this resultant spatial image is the stage upon which the aural show is actually performed, the speakers themselves are just the mechanisms used to create or excite that air stage. Think of it as an "air show", above and beyond the speakers. That is where the performers should appear to live. Take this image into consideration when you aim the speakers, and try pointing the open ends at the place you want the sound to seem to originate from. This really works!.
- The placement and orientation of the 7/8" reference speakers can make all the difference! You can put your Environmentals' reference monitor speakers almost anywhere you need, want, or are forced to, and the system will still work and be fun. Placement is not critical in the sense that you are NOT risking making your system sound "bad" (only turning the volume up too loud can do that). However, the extra time you spend finding the perfect speaker placement for your scale model sound system will be worth it. It is interesting, educational, fun, and easy. I love dinkin' around with speakers. Let your scenery dictate the fundamental locations as a starting point, just separate them within the scene. Start out applying them as you would approach setting up a stereo music system, that is, mirror image positions, symmetrically pointed towards you (after all, the soundtracks are stereo files). From here, you should just LISTEN. Try pointing the speakers in different directions from those same locations first. Each time you point a speaker in a new direction, stop and listen. Close your eyes and listen. Imagine where voices are coming from and then open your eyes and compare that with the actual location of the speaker. If there is a difference between the actual and perceived images, you may have something there! Listen from anywhere visitors might likely stand, and don't forget to check from a kid's point of view.
- If at any point you find yourself laughing out loud, stop
immediately! You have likely found a perfect location.
Enginear's Notes:
The more you understand about what you are hearing and doing, the better your system will sound to everyone, including you! These Enginear's Notes are designed to give you the background that will enable you to optimize every aspect of your installation. Yes, some of it is dry and technical. And, yes it is not essential in order for your system work the first time you try it. Scale sound is very forgiving, and in general, any sound is still better than silence. But so much creative effort went into the design of your soundtracks, that it would be a shame for you not to get the most back out of them. You do not need to try everything described here, but any of the things described below you do try, should result in an audible improvement!
- Although less critical in this particular application where speakers are rarely in phase physically, it is always good practice to maintain electrical phase integrity throughout an audio system. Here are some things to look for. Most stranded two conductor wire will have a silver (tinned) wire, and a copper wire. Sometimes two conductor wires are both copper (neither wire is tinned). In this case the insulation will always be marked in some way. Either one conductor will have a color stripe on it, or one conductor will have one or more ridges that can be seen and felt (the other wire will be smooth). Usually, but not always in electronics, the marked wire is negative. Most small headphones are wired with shielded wire, the shield (or outside braided wire) is the negative, and the insulated center conductor is the positive lead. The Circuitron speakers and Motorola PZTs are clearly marked. Sometimes only one speaker terminal is marked, that will be the positive terminal. If your speakers are not marked at all, just connect the wires the same way to all of them. Use this as a guideline for electrical phasing of your system.
- The optional Motorola piezo ceramic audio transducers (PZT's) are perhaps the most "pronounced" and dramatic improvement you can make to your installation. These tiny devices are nothing short of amazing. If you decide to use a pair on your Environmentals system, be sure to read the precautions in Part Four carefully. Mechanically, PZTs are almost indestructible (I have deliberately tried to blow them up,... without success!), and they cannot harm the rest of your playback system. However, they are so efficient in the extreme upper end of the frequency spectrum that they will call attention to their exact location. This is called creating a point source, and should, in this application, be avoided! The ears are very good at detecting the point source of any sound with high frequency components. This is called point source localization, and is primarily the result of high frequency information reaching each ear by a slightly different route around your head. The resultant phase shift between the same sound reaching each ear cues the listener to the exact relative location of the point source. There are other factors involved in this process, such as early reflections from surrounding surfaces, although these are more often the cause of a perceived shift in the apparent point source. The easiest and best way to eliminate the listener's ability to localize on your PZTs is to point them away from listening positions. Try aiming them at a wall, the ceiling, a corner between two walls, the floor, or even better, the corner where two walls and the ceiling all meet. If you mount them behind the scenery, try aiming them out to the sides. Anything you can do to splay, interrupt a direct line-of-sight, or introduce reflections between the PZT and the listener will accomplish the desired effect here. Ultimately, you want your Environmentals to be everywhere without being anywhere in particular. I took this whole thing one step farther on the IDHRR, by creating a single cricket sound system that incorporates a PZT aimed right at the listening positions. There is also a motion detector hidden in the scenery that shuts the cricket off when when anyone moves near. I admit that I love to watch visitors attracted to the point source, only to have it stop when they get too close (like a real cricket).
- If you want the lower voices (such as owls or frogs) to be more prominent, try experimenting with longer length PVC pipe. Keep in mind that the open end of the PVC is the business end of your speaker. In this instance you are creating a front loaded horn (of sorts) which couples the speaker cone to the air. It may seem like you are creating an enclosure behind the speaker (maybe one with a tuned port?), but technically, there is no enclosure behind the speaker, only the horn on the front. I draw this distinction in order to direct your attention to the actual physics and acoustics involved. This process is more akin to building a pipe organ pipe, where you are exciting a column of air that is tuned to a specific frequency range or note. In the experimental stages of this design work I actually built a slide whistle contraption from two telescoping pieces of PVC pipe, just to see what works. The results were interesting and probably worth pursuing farther. We figured it makes more sense to keep things as simple as possible, create a singular reference, and optimize all of the voices to it. But if you feel adventurous, try adjusting the resonant frequency. Longer is lower, and shorter is higher. If you are taking the distributed approach and will apply multiple pairs of speakers on each track, it would make sense to change the character of the additional speakers. If you have luck tuning to a specific critter voice, let me know which voice and the exact size (interior diameter and length) of the horn. The reference monitor design was created by ear, and this work should be done by ear, too. Of course, all this can be done predictably with the right formulas, but...
- Environmentals always sound better at extremely low volume levels. What volume is that exactly? This is addressed in a clever and simple device: the single cricket! At the front end of every soundtrack, there is the chirp of a solitary cricket for approximately fifteen seconds; this is your reference test tone. When you first set up the playback levels, turn the volume down until this cricket's chirp is barely audible then leave it there! This IS the correct setting for your particular system. At some point in every soundtrack the Enginears take full advantage of the remaining available headroom, so leave some there for us, please. Whether you are listening on the 7/8" Environmentals reference monitors you just glued together, or a JBL 5.1 theater surround system (I used both), the right volume is always the same! It helps if your railroad room is quiet and well isolated from outside ambient noise. You are setting the volume to the correct place relative to the existing noise floor in your room. If, for instance, you set levels late at night, you may need to reset them for a louder ambient noise level the next day. At any given point in time, in any given ambient noise level, on any given system, there is only one right volume setting: that volume setting when the lonely first cricket just becomes audible. Almost all commercial audio systems are set up, at least in part, with a 1khz simple sine wave test tone. Your cricket lives in this region too!
